If you want to sell on Amazon, you will need to read this blog post till the end. Amazon Seller Account allows you to sell on Amazon. If you want to open this type of account and have been having issues with that, this post here will save you from all that. I will show you steps that you can follow to register and new Amazon seller account, how you can Log into that account anytime you want, and how you can contact Amazon seller customer service if you still have some issues after reading this post.
What you Need before Creating an Amazon Seller Account
Before you go
- Make sure you have the following information ready:
- A business email address or an existing Amazon customer account.
- An internationally chargeable credit card for account setup and transaction fees.
- A valid government ID to verify your identity ensures security for both sellers and customers.
- Tax information relevant to your business activities.
- A phone number for communication purposes.
- A bank account where Amazon can transfer proceeds from your sales.
Having these details ready will streamline the seller registration process and help you get started on Amazon’s platform.
How to Sign up for Amazon Seller Account
To sell on Amazon is an extensive procedure but I guess that is what makes them stay number one in the Market. If you can follow the process till the end, you will be smiling at the end considering how much you will make from this. Follow these steps till the end to Sign up for your Amazon Seller account:
Step 1: Go to Amazon Seller Registration
- Visit the Amazon Seller Registration page at https://sell.amazon.com.
Step 2: Click “Learn More”
- Click on the “Learn more” button to explore the registration process.
Step 3: Fill Out the Form
- Complete the registration form with your information. You might be eligible for a dedicated Amazon account representative based on your submission. If you don’t have a business website, you can use “Amazon.com” in that field. After submitting, you’ll see a confirmation screen.
Step 4: Wait for an Email or Sign Up Immediately
- You can either wait for an email from an Amazon account representative or choose to sign up immediately. Click “Sign up” if you’re eager to start right away.
Step 5: Enter Your Email and Create a Password
- Choose your preferred seller plan and enter your email address and a password of your choice for your seller account. Click “Create your Amazon account.”
Step 6: Verify Your Email
- Amazon will send a verification code to your email. Enter the code on the verification screen to proceed.
Step 7: Provide Required Documents
- You’ll need to provide certain documents, including a valid government-issued ID or passport, a recent bank account or credit card statement, and a chargeable credit card.
Step 8: Choose Your Business Location and Type
- Show your business location (country) and type (e.g., privately owned, state-owned, charity). If you’re an individual, select “None, I am an individual” and provide your full name.
Step 9: Agree and Continue
- Click “Agree and continue” to move forward.
Step 10: Enter Personal Information
- Provide personal details, including identification (passport number or driver’s license). Verify your phone number through a text or call.
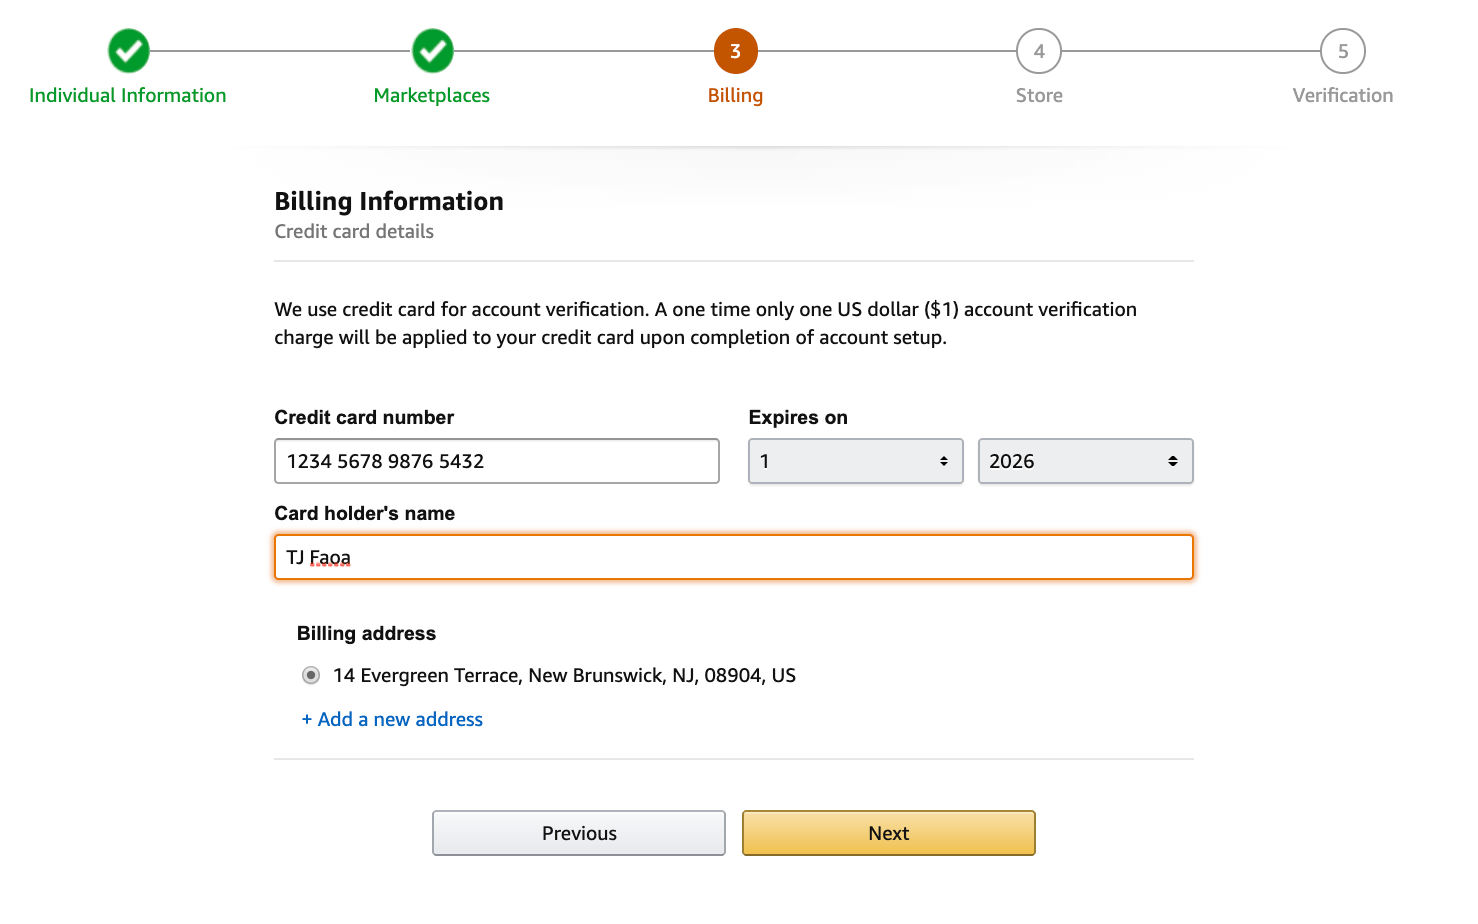
Step 11: Enter Billing Information
- Supply Amazon with your billing information, including a valid bank account and credit card number.
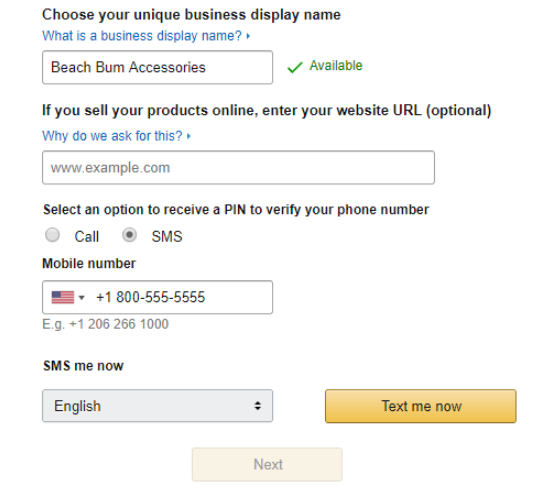
Step 12: Describe Your Amazon Store and Products
- Answer questions about your Amazon store name, UPCs for products, diversity certifications, and whether you’re the manufacturer or brand owner of the products.
Step 13: Identity Verification
- Upload images of your ID (license or passport) and a bank statement. Click “Submit.”
Step 14: Video Call Verification
- Complete an Identity Verification via video call with an Amazon associate to verify your documents and personal information.
Step 15: Start Selling
- Once verified, you can start selling on Amazon. Set up 2-step verification for added security on your account.
Step 16: Access Your Seller Account
- Log into your seller account at https://sellercentral.amazon.com.
Congratulations! You’re now ready to begin selling on Amazon as a registered seller.
How to Log into Your Amazon Seller Account
If you already have an account with Amazon Seller and you are looking for how you can log into that account. Follow the simple steps below to see how:
Step 1: Visit the Website or App
- Go to the website or app that provides the option for “Login with Amazon Seller.”
Step 2: Choose “Login with Amazon Seller“
- Look for and click on the “Login with Amazon Seller” button.
Step 3: Amazon Seller Sign-In Screen
- An Amazon Seller-hosted sign-in screen will appear. It’s important to note that websites and apps registered with Login with Amazon will always have a sign-in screen with an Amazon web address. You won’t be asked to provide your Amazon password to the third-party site directly.
Step 4: Enter Your Credentials
- Enter your Amazon username and password.
Step 5: Consent for Data Sharing
- The first time you sign in to a website or app using “Login with Amazon Seller,” you may see a screen requesting your consent to share specific information from your profile. If you’re comfortable with sharing this data with the website or app, select “Okay.”
Step 6: Return to the Website or App
- After granting consent or signing in, you will be directed back to the website or app as a registered user or prompted to complete the registration process if necessary.
That’s it! You’ve successfully used “Login with Amazon Seller” to access the website or app.
How to Contact Amazon Seller Customer Service
If you are a seller on Amazon and you wish to contact Amazon Seller customer service, this is how you can do that. Follow the steps below to contact Seller customer service:
Step 1: Access Seller Central Help
- In Seller Central, go to the top right corner of the page and click on “Help.”
Step 2: Review Support Solutions
- On the help page, you might see support solutions recommended for you. This page also allows you to view your current case log.
Step 3: “Need More Help?”
- If none of the recommended solutions address your issue, scroll down and find the “Need more help?” section. Click on “Get Support.”
Step 4: Choose Your Support Category
- You’ll be presented with two options:
- “Selling on Amazon”
- “Sponsor Ads and Store”
- Most sellers choose “Selling on Amazon.”
Step 5: Describe Your Issue
- After selecting a category, you’ll find a field marked “Describe Your Issue” where you can describe your situation in writing. Amazon will offer solutions based on your description, aiming to resolve your issue without opening a support case.
Step 6: Open a Case or Request Phone Support
- At this stage, you can choose to open a support case or request a phone call for further assistance. If you’re unsure about the nature of your issue, you can browse for it in the menu.
Step 7: Browse for Your Issue
- Click on “Or, browse for your issue in the menu” at the bottom of the form. This allows you to explore different issue categories until you find the one that closely matches your situation.