Staying connected is more critical now than ever before. If you want to activate an eSim instead of the contemporary SIM card that has to do with the SIM tray, this post is for you. With this technology, you will be able to manage several SIM cards on your device at a go. This post will guide you on the steps to activate as well as what device you need to have before you can enjoy this service.
Supported iPhone Devices
- iPhone 15
- iPhone 15 Plus
- iPhone 15 Pro
- iPhone 15 Pro Max
- iPhone 14
- iPhone 14 Pro
- iPhone 14 Pro Max
- iPhone 13
- iPhone 13 Mini
- iPhone 13 Pro
- iPhone 13 Pro Max
- iPhone 12 Mini
- iPhone 12
- iPhone 12 Pro
- iPhone 12 Pro Max
- iPhone 11
- iPhone 11 Pro
- iPhone 11 Pro Max
- iPhone XR
- iPhone XS Max
- iPhone XS
- iPhone X
- iPhone 8 Plus
- iPhone 8
- iPhone SE (1st + 2nd Gen)
- iPhone 7 Plus
- iPhone 7
- iPhone 6s Plus
- iPhone 6s
- iPhone 6
Essential Requirements for Activating an eSIM
iPhone Compatibility:
To activate an eSIM, you’ll need an iPhone that supports this cutting-edge technology. Compatible models include the iPhone XS, iPhone XS Max, iPhone XR, or any later iPhone models.
Supported Carrier or Service Provider:
Ensure that your wireless carrier or service provider supports eSIM activation. While eSIM adoption is rapidly growing, it’s essential to verify that your chosen carrier offers this feature.
Wi-Fi Connectivity:
Before you embark on the eSIM activation process, make sure your new iPhone is connected to a Wi-Fi network. A stable Wi-Fi connection is necessary to download the eSIM data and complete the setup seamlessly.
Location Consideration:
Note that eSIM activation on iPhone is not available in mainland China. However, in Hong Kong and Macao, select iPhone models do support eSIM functionality. If you’re in these regions, check your specific iPhone model’s compatibility with eSIM.
By meeting these requirements, you’ll be well-prepared to unlock the benefits of eSIM technology on your iPhone, enabling you to enjoy the convenience of multiple phone numbers and seamless connectivity.
Benefits of Activating an eSim
There are many but I will be sharing four benefits of activating an eSIM:
Flexibility and Convenience:
eSIM technology offers the freedom to switch between multiple carriers or phone numbers without needing a physical SIM card. This flexibility is especially valuable for travelers who can easily switch to a local carrier or data plan when abroad, eliminating the need for physical SIM card swaps.
Dual SIM Capability:
One of the primary advantages of eSIM is the ability to have dual SIM functionality on your iPhone. This means you can have two separate phone numbers on a single device, making it easier to manage personal and work-related calls or maintain a local and international number simultaneously.
Reduced Physical Clutter:
With eSIMs, you no longer need to carry around physical SIM cards or worry about losing them. This simplifies the process of switching devices or upgrading your phone, as you won’t need to visit a carrier store to obtain a new SIM card.
Easy Remote Activation:
Activating an eSIM is a hassle-free process that can often be done remotely through an app or online portal provided by your carrier. This eliminates the need to visit a physical store or wait for a physical SIM card to be delivered, saving you time and effort.
How to Activate an eSim on an iPhone

Follow the steps below to activate an eSim on your iPhone:
Step 1: Unbox Your New iPhone
- First, unbox your new iPhone, whether it’s an iPhone 14 model or later.
Step 2: Turn On Your iPhone
- Power on your iPhone by pressing and holding the side button until you see the Apple logo on the screen.
Step 3: Follow On-Screen Instructions
- During the initial setup, your iPhone will guide you through the process with on-screen instructions. This is where you’ll activate your eSIM.
Step 4: Check for eSIM Activation Methods
- Your carrier might offer different eSIM activation methods:
- eSIM Carrier Activation: Your carrier assigns an eSIM to your iPhone when you purchase it. If this method is available, follow the on-screen prompts.
- eSIM Quick Transfer: This allows you to transfer your SIM from your previous iPhone to the new one without contacting your carrier. Make sure both devices are signed in with the same Apple ID, or ensure your previous iPhone is unlocked, nearby, with Bluetooth on, and using iOS 16 or later.
- If these options are not available, proceed to the next step.
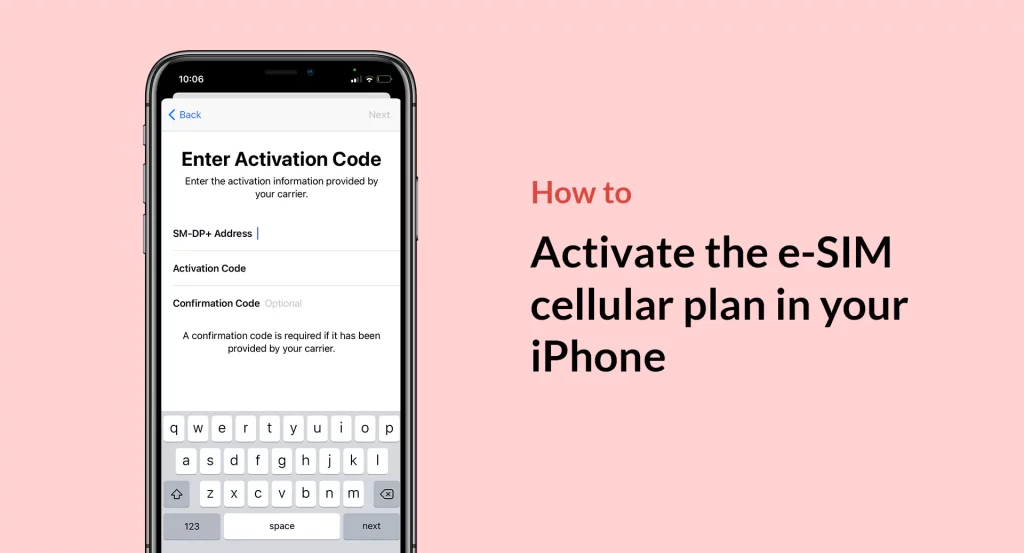
Step 5: Contact Your Carrier for Activation
- If none of the above methods apply, you can still activate your eSIM by contacting your carrier. They can provide activation through a QR code or their iPhone app.
Step 6: Complete the Activation
- Follow the specific activation instructions provided by your carrier to complete the process.
That’s it! Setting up an eSIM on your iPhone is generally straightforward, and you have multiple activation options to choose from, depending on your carrier’s support and the iPhone model you have.
How to Use eSIM Carrier Activation on iPhone
Check Compatibility:
Ensure both your old and new iPhones are:
- Signed in with the same Apple ID.
- Unlocked.
- Near each other with Bluetooth enabled.
- Running iOS 16 or a later version.
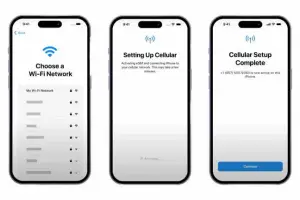
Carrier Plan Notification:
- Look out for a notification that says “Carrier Cellular Plan Ready to Be Installed.”
Access Settings:
- Open the Settings app on your iPhone.
Activate Carrier Plan:
- Tap on “Carrier Cellular Plan Ready to Be Installed.”
Continue Activation:
- Tap “Continue” at the bottom of the screen.
Check Cellular Connectivity:
- Make a test call on your iPhone to ensure cellular connectivity is working. If the call doesn’t go through, contact your carrier for assistance.
Remove Physical SIM (if needed):
- If the eSIM plan replaces your physical SIM plan, remove your physical SIM card.
Restart Your iPhone:
- Restart your iPhone to complete the activation process.
Following these straightforward steps will help you successfully activate your eSIM using eSIM Carrier Activation on your iPhone.
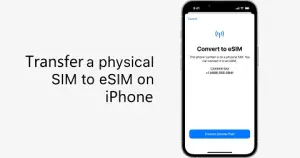
Transferring a Physical SIM to eSIM:

Access Cellular Settings:
- On your new iPhone, open “Settings.”
Add Cellular Plan:
- Scroll down and select “Cellular,” then tap “Add Cellular Plan.”
Choose Plan to Transfer:
- Choose the cellular plan you want to transfer from another iPhone. If you don’t see a list of numbers, tap “Transfer From Another iPhone.” Note that both devices should be running iOS 16 or later for this to work.
Follow Transfer Instructions:
- Check your previous iPhone for transfer instructions. If available, follow the prompts. This may involve tapping “Transfer” or entering a verification code displayed on your new iPhone.
Wait for Activation:
- Wait for the cellular plan to activate on your new iPhone. Your previous SIM card will be deactivated when the eSIM plan on your new iPhone activates.
Complete Carrier Setup (if needed):
- If a banner appears on your new iPhone saying “Finish Setting Up Your Carrier’s Cellular Plan,” tap it. This will redirect you to your carrier’s webpage to complete the eSIM transfer. If you encounter any issues, don’t hesitate to contact your carrier for assistance.
Converting a Physical SIM to an eSIM on the Same iPhone
Access Cellular Settings:
- Open “Settings” on your iPhone.
Convert to eSIM:
- Tap “Cellular.”
Check for Conversion Option:
- Look for “Convert to eSIM.” If you don’t see this option, it means your carrier doesn’t support this feature. In that case, contact your carrier for assistance in moving your phone number from the physical SIM to an eSIM using eSIM Carrier Activation or by scanning a QR code.
Confirm Conversion:
- Tap “Convert Cellular Plan.”
Activate eSIM:
- Next, tap “Convert to eSIM.”
Wait for Activation:
- Wait for your eSIM to activate. Your previous SIM card will be deactivated automatically when the eSIM plan on your iPhone activates.
Remove Physical SIM:
- Carefully remove the physical SIM card from your iPhone.
Restart Your iPhone:
- Finally, restart your iPhone to complete the conversion process.
Conclusion
Have you been able to activate your eSim following this guide? Please leave a comment and I will respond to within 24 hours if you still have other issues activating your eSim. If you follow a different step to activate yours, you can also leave the steps in our comment section and we will update this post with that to help others.