Hey, sometimes your phone may be slacking and you may not know how to solve this issue. Solving this is very easy to do. It may take you to just clear your device cache memory to get back to that smooth and easygoing device again. In this blog entry, I will be teaching you how to do this on Samsung. Enough of the talking, let us see how we can get this done as you read below.
Supported Samsung Galaxy Device
- Samsung Galaxy F34
- Samsung Galaxy F32
- Samsung Galaxy F31
- Samsung Galaxy F30
- Samsung Galaxy Z Fold 5
- Samsung Galaxy Z Fold 4, Z Fold 3
- Samsung Galaxy Z Fold 2
- Samsung Galaxy Z Fold
- Samsung Galaxy Z Flip 5
- Samsung Galaxy Z Flip 4
- Samsung Galaxy Z Flip 3
- Samsung Galaxy Z Flip 2
- Samsung Galaxy Z Flip
- Samsung Galaxy M34
- Samsung Galaxy M33
- Samsung Galaxy M32
- Samsung Galaxy M31
- Samsung Galaxy M30
- Samsung Galaxy F54
- Samsung Galaxy F53
- Samsung Galaxy F52
- Samsung Galaxy F51
- Samsung Galaxy F50
- Samsung Galaxy A24
- Samsung Galaxy A23
- Samsung Galaxy A22
- Samsung Galaxy A22
- Samsung Galaxy A21
- Samsung Galaxy A20
- Samsung Galaxy F14
- Samsung Galaxy F13
- Samsung Galaxy F12
- Samsung Galaxy F11
- Samsung Galaxy F10
- Samsung Galaxy M54
- Samsung Galaxy M53
- Samsung Galaxy M52
- Samsung Galaxy M51
- Samsung Galaxy M50
- Samsung Galaxy A54
- Samsung Galaxy A53
- Samsung Galaxy A52
- Samsung Galaxy A51
- Samsung Galaxy A50
- Samsung Galaxy A34
- Samsung Galaxy A33
- Samsung Galaxy A32
- Samsung Galaxy A31
- Samsung Galaxy A30
- Samsung Galaxy M14
- Samsung Galaxy M13
- Samsung Galaxy M12
- Samsung Galaxy M11
- Samsung Galaxy M10
- Samsung Galaxy S23 Ultra
- Samsung Galaxy S23 Plus
- Samsung Galaxy S23
- Samsung Galaxy S23 FE
- Samsung Galaxy S22
- Samsung Galaxy S22 Ultra
- Samsung Galaxy S21
- Samsung Galaxy S21 Ultra
- Samsung Galaxy S20
- Samsung Galaxy S20 Plus
- Samsung Galaxy S20 FE
- Samsung Galaxy S10 Plus
- Samsung Galaxy S10
- Samsung Galaxy S9 Plus
- Samsung Galaxy S8 Plus
- Samsung Galaxy S7
- Samsung Galaxy A14
- Samsung Galaxy A13
- Samsung Galaxy A12
- Samsung Galaxy A11
- Samsung Galaxy A10
- Samsung Galaxy F04
- Samsung Galaxy F03
- Samsung Galaxy F02
- Samsung Galaxy F01
- Samsung Galaxy A04e
- Samsung Galaxy A03e
- Samsung Galaxy A02
- Samsung Galaxy A04s
- Samsung Galaxy A03s
- Samsung Galaxy Xcover 6
- Samsung Galaxy Xcover 5
- Samsung Galaxy Xcover 4
- Samsung Galaxy Xcover 3
- Samsung Galaxy Xcover 2.
Optimize Your Device and Clear the App Cache with Device Care
Device care is a setting option on your device that assists you in terms of caring for the device software. In case your device should run into any form of issue while running the best thing to do is use the device care to solve the issue and what we are discussing here is one of the ways you can do it. By following these steps, you can easily optimize your device and clear the app cache using Device Care.
Step 1: Access Device Care Settings
Begin by unlocking your smartphone and launching the Settings app. Once inside the settings, scroll or search for the “Battery and Device Care” option. Tap on it to access the Device Care settings.
Step 2: Initiate Optimization
Within the Device Care settings, you’ll find the “Optimize now” option. Tapping this button will trigger Device Care to work its magic. It will not only optimize your device for better performance but also clear out unnecessary cached data from your apps.
Device Care’s Optimization Feature Performs the Following Actions:
- Closes Background Apps: Device Care efficiently shuts down apps running in the background, which can drain your device’s resources and battery.
- Manages Battery Usage: It monitors for any irregular battery usage patterns and optimizes power-hungry apps to extend your device’s battery life.
- Scans for Crashed Apps and Malware: Device Care conducts thorough scans to identify any apps that may have crashed or suspicious activities that might indicate malware.
Automate the Optimization Process:
If you’d like your device to perform this optimization automatically when it’s not in use, follow these additional steps:
- Tap “More options” within the Device Care settings.
- Choose “Automation.”
- Look for “Auto optimize daily” and tap the switch to activate it.
Once you are done, your device will be optimized automatically daily when your phone is free of use.
This settings option offers an effective way to care for your device and keep it free and optimized for use always. By regularly clearing out unnecessary cached data and optimizing background processes, you can enjoy a smoother and more efficient smartphone experience. Plus, with the option to automate the process, you can ensure your device stays in top shape without any extra effort.
How to Clear App Cache on Your Device
If you do not clear the cache memory, over time it will accumulate and take a considerable amount of space on your device. Clearing the cache of specific apps can help free up space and potentially resolve issues with app performance. Follow these straightforward steps to clear the cache of any app on your device:
Step 1: Access the Device Settings
Begin by unlocking your device and locating the Settings app. The Settings app is typically represented by a gear or cogwheel icon. Tap on it to access your device’s settings.
Step 2: Navigate to the Apps Section
Within the Settings menu, scroll down or search for the “Apps” or “Applications” option.
Step 3: Locate the App to Clear Cache
In the Apps section, you’ll find a list of installed applications. You can either scroll through the list to find the app you want to clear the cache for or use the search bar to quickly locate it. For example, if you want to clear the cache of the Gmail app, locate and tap on “Gmail” in the list.
Step 4: Access the Storage Settings
After selecting the app you want to clear the cache for, you’ll be taken to the app’s information page. To clear the cache, tap on the “Storage” option.
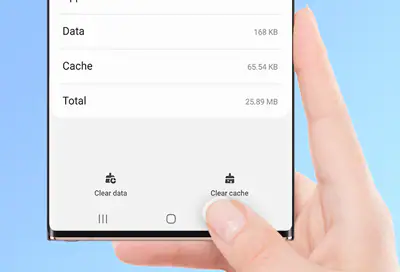
Step 5: Clear the Cache
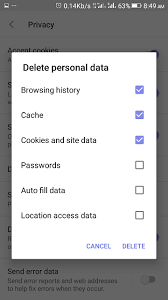
Within the Storage section, you’ll find various data categories related to the app, including “Cache.” Tap on “Clear cache” to initiate the cache-clearing process.
Keep in mind that clearing the cache won’t delete your app’s essential data, such as login credentials or preferences.
Why Clear Cache on Samsung
Clearing the cache on your Samsung device is like giving it a little spring cleaning. Here’s why it’s important and how it helps:
- Speeds Up Your Device: As you use apps, they store temporary data called cache. Over time, this cache can pile up and slow down your device. Clearing it makes your device run faster and smoother.
- Frees Up Space: Cache takes up storage space on your phone or tablet. By clearing it, you create room for more photos, videos, and apps.
- Fixes App Problems: If an app is acting up—crashing, freezing, or not working as it should—clearing its cache can often make it behave better. It’s like a reset button for that app.
- Protects Your Privacy: Cached data might contain personal information, like your login details or browsing history. Clearing it helps keep your private info safe.
- Routine Maintenance: Think of it as regular upkeep for your device. Just like you clean your house or car, clearing the cache keeps your Samsung device in good shape.
- After App Updates: When you update an app, it’s a good idea to clear its cache. This ensures it works smoothly with the new version.
So, clearing your Samsung device’s cache is a smart way to keep it running well, free up space, fix app issues, protect your privacy, and make sure it stays speedy and efficient. It’s like a little tune-up for your Smartphone!
Conclusion
Were you able to clear your cache on Samsung after reading this piece? Please leave a comment if you have another issue that has not been attended to in this post.