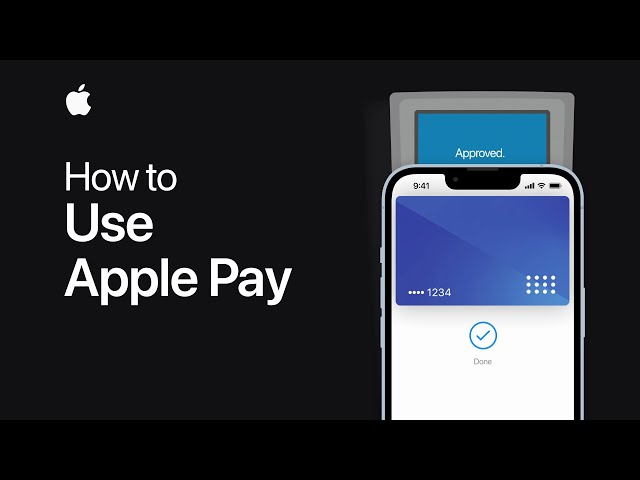
Have you seen people using Apple Pay to make payments and you wonder if you can get the same on your device? Apple Pay has revolutionized the way we make payments and in this blog post, I will guide you on how to use Apple Pay on all iPhones. Just follow this guide to the end to find out how you can get this done with ease.
Supported iPhone Devices
- iPhone 15
- iPhone 15 Plus
- iPhone 15 Pro
- iPhone 15 Pro Max
- iPhone 14
- iPhone 14 Pro
- iPhone 14 Pro Max
- iPhone 13
- iPhone 13 Mini
- iPhone 13 Pro
- iPhone 13 Pro Max
- iPhone 12 Mini
- iPhone 12
- iPhone 12 Pro
- iPhone 12 Pro Max
- iPhone 11
- iPhone 11 Pro
- iPhone 11 Pro Max
- iPhone XR
- iPhone XS Max
- iPhone XS
- iPhone X
- iPhone 8 Plus
- iPhone 8
- iPhone SE (1st + 2nd Gen)
- iPhone 7 Plus
- iPhone 7
- iPhone 6s Plus
- iPhone 6s
- iPhone 6
What is Apple Pay?
Apple Pay is a mobile payment application developed by Apple convenient payment to all iPhone users. If you are a user, you can link your credit or debit card and make payments with ease.
Is Apple Pay Safe?
It is believed to be one of the safest means to make payments out there. Here are five reasons I consider Apple Pay safe:
- Tokenization: Apple Pay uses a technology called tokenization, which replaces your actual credit or debit card number with a unique device-specific number or “token.” This token is used for transactions instead of your card number, making it extremely difficult for hackers to steal your sensitive financial information during transactions.
- Biometric Authentication: Apple Pay relies on biometric authentication methods, such as Touch ID or Face ID, to authorize transactions. This means that only you can make payments using your device since it requires your fingerprint or facial recognition, adding an extra layer of security.
- Secure Element: Apple Pay stores your card information in a dedicated hardware component called the Secure Element, which is isolated from the rest of your device’s software and cannot be accessed by apps or malware. This hardware-based security ensures that your card details are well-protected.
- Device Lock and Remote Wipe: If your device is lost or stolen, you can remotely lock or wipe it using Apple’s Find My app. This will make it impossible for anyone to have unauthorized access to your account.
- Transaction Alerts and Notifications: Apple Pay provides real-time transaction notifications on your device. If someone tries to make a payment using your Apple Pay without your consent, you’ll be alerted immediately. This allows you to take action and report any suspicious activity promptly.
How to Set up Apple Pay

To set up Apple Pay on your device, you just need a few steps to get that done. Here’s a step-by-step guide to help you get started:
Step 1: Ensure Compatibility Before you embark on your Apple Pay journey, ensure that you have a compatible device. Apple Pay is available on devices with the latest versions of iOS or iPadOS (for iPhones and iPads), watchOS (for Apple Watches), or macOS (for Mac computers). If your device meets this requirement, you’re well on your way.
Step 2: Gather a Supported Card: Next, you’ll need to have a supported debit, credit, or prepaid card from a participating card issuer. Apple Pay has established partnerships with a wide range of banks and financial institutions, making it likely that your card is supported. This card will serve as your digital payment method within the Apple Pay ecosystem.
Step 3: Sign in with Your Apple ID: Ensure that you are signed in to your Apple device using your Apple ID.
Step 4: Add Your Card to Wallet
Now, let’s dive into the specifics of adding your card to the Wallet app:
- a. Open the Wallet app on your compatible device. It’s usually pre-installed, but if it isn’t, you can easily download it from the App Store.
- b. Tap the “+” (plus) icon in the top-right corner to initiate the card-adding process.
- c. You’ll be prompted to enter your card details manually or, more conveniently, use your device’s camera to capture your card information. Apple Pay is designed to make this step as user-friendly as possible.
- d. Follow the on-screen instructions to verify your card with your bank or card issuer. This may involve receiving a one-time code through text, email, or a phone call for added security.
- e. Once verified, your card will be added to your Wallet, and you’re now ready to start using Apple Pay for a wide range of transactions.
Step 5: Secure Payments with Ease
With your card securely added to your Wallet, you can now enjoy the convenience of Apple Pay for in-store, online, and in-app purchases. Simply look for the Apple Pay logo or the contactless payment symbol at participating merchants, and use your compatible device to complete transactions. Authentication is a breeze, with the option to use biometric data like Touch ID or Face ID or your device’s passcode.
How to add a debit or credit card to your iPhone
The Wallet app on your iPhone empowers you to seamlessly add debit or credit cards for use with Apple Pay, offering you a convenient and secure way to make payments. Here’s a step-by-step walkthrough, along with some additional insights:
Step 1: Open the Wallet App Begin by launching the Wallet app on your iPhone. This app serves as your digital wallet, allowing you to manage your payment methods effortlessly.
Step 2: Initiate Card Addition In the Wallet app, you’ll find the “Add” button, usually depicted as a plus (+) icon. Tap on this button to begin the process of adding a new card.
Step 3: Choose Card Type You have two options here:
- a. Debit or Credit Card: If you’re adding a new card that you haven’t used with Apple Pay before, tap on the “Debit or Credit Card” option. This is for cards that are not already in your Apple Pay account.
- b. Previous Cards: To add a card that you’ve used with Apple Pay in the past, tap “Previous Cards.” This is useful for re-adding a card that you may have temporarily removed or replaced.
Step 4: Continue and Follow Instructions Tap “Continue” to proceed. You’ll then be guided through a series of on-screen steps to add your new card. This typically involves entering your card details manually or using your iPhone’s camera to scan the card.
Step 5: Verification with Your Bank After entering your card information, you may be required to verify your details with your bank or card issuer. This step is crucial for security purposes. Your bank might send you a one-time code through text, email, or a phone call. Follow the provided instructions to complete the verification process.
Step 6: Apple Watch Option If you have a paired Apple Watch, you’ll have the option to add the card to your watch as well. This allows you to make payments using your Apple Watch, providing added convenience when you’re on the go.
Step 7: Removing Cards To remove a card from the “Previous Cards” screen, tap “Edit,” then locate the card you wish to remove. Tap the “Remove” button, and a confirmation prompt will appear. Confirm by tapping “Delete Card,” and the card will be removed from all your devices.
By following these steps, you can easily add and manage your debit or credit cards on your iPhone for use with Apple Pay. This secure and user-friendly system simplifies your payment options and enhances your digital wallet experience.
How to add a debit or credit card to your Apple Watch
- Open the Apple Watch App: Start by opening the Apple Watch app on your paired iPhone.
- Access Wallet & Apple Pay: Inside the Apple Watch app, navigate to the “My Watch” tab, and tap on “Wallet & Apple Pay.”
- Begin Adding a Card: To add a new card, tap on “Add Card.”
- Select Card Type: Choose whether you want to add a “Debit or Credit Card” if it’s a new card, or tap “Previous Card” if you’ve used this card with Apple Pay before.
- Continue: Tap “Continue” to proceed.
- Follow On-Screen Steps: Simply follow the instructions displayed on your screen to add your card. This may involve manually entering your card details or using your iPhone’s camera to scan the card.
- Verify If Required: If your bank or card issuer requires additional verification, they may prompt you to provide more information or download an app. Follow their instructions to complete this step.
You can quickly add a debit or credit card to your Apple Watch, making it even more convenient to use Apple Pay for your everyday transactions.